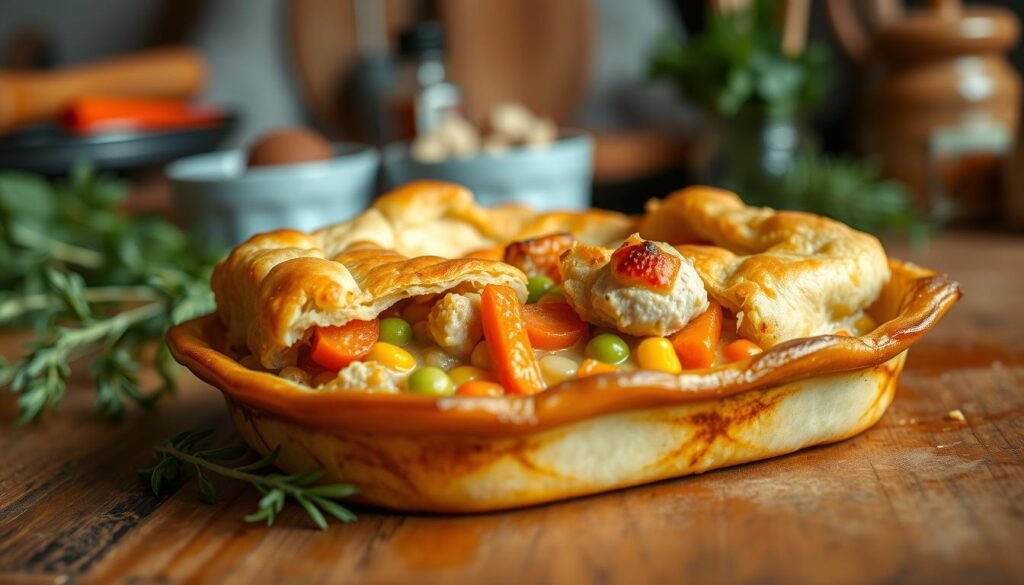
Ready to turn pantry staples into a warm, flaky casserole that every family asks for? We built this version from the viral TikTok method: a melted-butter base, shredded rotisserie meat, frozen veggies, cream soup, and a Cheddar Bay biscuit topping that browns to perfection.
We keep prep simple with simple ingredients, minimal bowls, and a one-baking-dish approach. Bake at 350–375°F for about 50–65 minutes, then rest 10–15 minutes so the filling firms up.
Our twist folds shredded cheddar into the biscuit mix and brushes the top with seasoned butter for extra flavor and a golden finish. We also call out seasoning tips—garlic and onion powder—so the filling never tastes bland.
Key Takeaways
- One-dish comfort that becomes a family favorite.
- TikTok-inspired no-stir layering keeps assembly fast.
- Cheddar Bay biscuit twist upgrades the topping.
- Bake 50–65 minutes, then rest 10–15 minutes before slicing.
- Works with rotisserie or shredded breasts and frozen vegetables.
Why we love this chicken cobbler recipe right now
Comfort food meets convenience in a one-dish bake that feels like home and comes together fast. We lean on simple ingredients and pantry shortcuts so a busy night still delivers big flavor.
Comfort food meets convenience: rotisserie chicken, frozen mixed vegetables, and buttery biscuit topping
We start with store-bought rotisserie chicken and frozen mixed vegetables to keep shopping easy and prep quick. A base of cream chicken soup adds saucy richness without extra steps.
The biscuit mix topping gives a flaky finish. Brush the top with seasoned butter at the end for a deep, golden brown color and extra flavor.
TikTok-inspired layers, elevated seasoning, and golden brown finish
The viral, no-stir layering — melted butter, chicken, frozen mixed, soup, then biscuit mix — keeps assembly simple and reliable. Testers found the original pale version bland, so we boost taste with garlic powder, onion powder, and black pepper.
- We trust the TikTok layering technique for lift and rise.
- We upgrade the filling with cream chicken soup and added seasonings.
- We use a Cheddar Bay seasoning packet or extra cheddar in the topping for restaurant-level flavor.
- We bake until the top is golden brown, then brush with butter for sheen and taste.
“A quick butter-and-seasoning brush after baking locks in moisture and gives the top a picture-perfect finish.“
In about an hour in the oven, this casserole becomes a weeknight family favorite. We also point readers to our Chicken and Dumplings shortcuts — crockpot and 4-ingredient versions — for more creamy, biscuit-topped comfort.
Ingredients you’ll need for bold, homestyle flavor
Start by deciding which protein and biscuit mix match your time and texture goals. We plan for about 3–4 cups shredded or chopped meat: rotisserie chicken for speed, shredded breasts for a lean bite, or chopped for more chew.
For the creamy base, use a 10.5 oz can of cream chicken soup plus about 2 cups low-sodium chicken broth. Stir in 2 tsp Better Than Bouillon if you want a deeper, pot-pie-style flavor.
Keep vegetables simple with a 12 oz bag of frozen mixed vegetables (peas and carrots work well). Season with black pepper and pantry spices to taste.
Choose an 11.36 oz Red Lobster cheddar bay biscuit mix (2 cups milk) and optionally fold in 1/2 cup shredded cheddar. Reserve the seasoning packet to combine with melted butter for brushing after baking.
- Set up one bowl for the soup-and-broth whisk and a second for the biscuit mix and milk.
- Measure with cups so prep stays fast and foolproof.
| Ingredient | Amount | Purpose | Brand/Note |
|---|---|---|---|
| Meat | 3–4 cups | Base protein | Rotisserie or shredded breasts |
| Cream of chicken soup | 10.5 oz | Rich, pourable sauce | Herbed variety boosts flavor |
| Chicken broth | 2 cups | Thins soup to gravy | Low-sodium preferred |
| Cheddar Bay biscuit mix | 11.36 oz | Topping | Use Red Lobster mix; add 1/2 cup cheddar if desired |
Step-by-step: build, layer, and bake the cobbler
Our first step is a simple one: preheat oven to 350–375°F and ready a 9×13 baking dish. Pour melted butter into the dish so the base crisps while the topping bakes.
Prep the pan and layer the filling
Layer shredded or chopped chicken, then scatter frozen mixed vegetables. Do not stir—this step keeps the structure intact and helps the biscuit batter rise.
Whisk and pour the sauce
In a separate bowl, whisk a can of cream soup with 2 cups broth and spices. Pour gently over layers so the sauce sinks without disturbing them.
Mix the biscuit topping and bake
Stir the biscuit mix with milk (add cheddar if you like) and spread the biscuit topping evenly. Bake 50–65 minutes until the top turns deep golden brown.
“Brush the hot top with melted butter mixed with the Cheddar Bay seasoning packet for a glossy finish.”
Rest 10–15 minutes before slicing. These clear steps save time and dishes and make a reliable casserole every time.
| Step | Action | Time / Cue |
|---|---|---|
| 1 | Preheat oven; pour melted butter into baking dish | 350–375°F |
| 2 | Layer chicken and frozen vegetables (do not stir) | Quick assembly |
| 3 | Whisk soup + broth in separate bowl; pour over | Even coverage |
| 4 | Spread biscuit topping and bake | 50–65 minutes; golden brown top |
| 5 | Brush seasoned butter, rest | 10–15 minutes |
Our secret twist: Red Lobster Cheddar Bay meets chicken cobbler
One little swap lifts the whole dish. We use the Red Lobster approach to make the biscuit topping taste like a restaurant favorite without extra pans or steps.

Using the seasoning packet for a post-bake buttery finish
After baking to a deep, golden brown top, we whisk the seasoning packet into melted butter.
Then we brush the warm crust so every square gets that garlicky, savory boost. This preserves the edge crisp and keeps the center tender.
Add cheese to the biscuit layer for that “cheddar bay” pop
For more punch, fold 1/2 cup shredded cheddar into the biscuit mix before spreading. The extra cheese gives the biscuit topping richer mouthfeel and more cheddar bay flavor.
- Reserve the seasoning packet and whisk into melted butter for a final brush.
- Add optional shredded cheddar to the biscuit mix for bolder taste.
- Focus on a golden brown top, then finish with the buttery brush for aroma and shine.
- This twist stays one-dish and weeknight-ready—no extra time, only better results.
| Finish | Action | Result |
|---|---|---|
| Seasoning packet brush | Whisk into melted butter; brush post-bake | Garlicky, glossy top with crisp edges |
| Cheddar in mix | Fold 1/2 cup shredded cheddar into biscuit mix | Richer, cheesier biscuit topping and aroma |
| Bake cue | Watch for deep golden brown on top | Even color, ideal texture, ready to rest |
“This simple finish gives our cobbler a restaurant-style Cheddar Bay moment the whole table loves.”
Chicken and dumplings, two easy ways: crockpot and 4-ingredient
For hands-off comfort, we recommend the crockpot method. Combine cream of chicken soup, broth, and cooked meat in the slow cooker. Let it simmer until the sauce is silky.
Near the end, drop biscuit dough or quartered biscuits into the hot liquid. In about minutes, the dumplings steam tender without falling apart.
Short on time? Use the 4-ingredient shortcut: cream chicken, broth, shredded chicken, and biscuit mix. Cook until dumplings set and the sauce thickens. This takes just a few simple steps and minimal bowls.
Secret upgrade: swap in bay biscuit mix or a Cheddar Bay biscuit dough. The herby, buttery flavor mirrors our cobbler top and boosts the whole dish.
- We recommend shredded chicken for even texture.
- Keep portions to cups for consistency when adding broth.
- Use frozen vegetables or fresh—both fold into the creamy base well.
| Method | Key steps | Result |
|---|---|---|
| Crockpot | Cream of chicken + broth + meat; add biscuits late | Set-and-forget, rich base |
| 4-Ingredient | Cream chicken + broth + shredded chicken + biscuit mix | Fast, pantry-friendly |
| Upgrade | Use bay biscuit mix or cheddar bay biscuit dough | Buttery, herby dumplings |
“Same pantry staples, different format—warm bowls ready when you are.”
Pro tips for a foolproof, golden brown finish
A few timed moves make the difference between a pale bake and a deep golden brown finish. Start by choosing the right baking dish so heat and browning behave predictably.
Don’t stir the layers — let the structure form
We never stir the layers. Letting the biscuit batter float over the filling creates that classic cobbler structure and lift.
Watch the bake time and rest
Bake about 50–65 minutes until edges show deep color and the center is set. Then rest 10–15 minutes so the sauce thickens and the top stays crisp.
Use pans wisely
Metal pans heat faster; grease them well and check early. Pyrex or ceramic may need a few extra minutes of baking. Train your eye for deep browning at the edges and an even color across the top.
Season and finish for maximum flavor
Boost the filling with garlic powder, onion powder, and a grind of black pepper so the final dish isn’t bland.
Use the oven window to check doneness and avoid opening the door. Test the center gently — no jiggle — then brush with seasoned butter for a glossy finish that locks in flavor.

| Tip | Action | Result |
|---|---|---|
| Do not stir | Layer and leave | Lifted biscuit topping |
| Bake cue | 50–65 minutes; rest 10–15 minutes | Set filling; crisp edges |
| Pan choice | Grease metal; add time for Pyrex | Even browning without burning |
“Brush the hot top immediately after baking; it seals flavor without sogginess.”
Flexible swaps and add-ins the whole family will love
A few smart swaps let us tailor flavor and texture while keeping prep fast and predictable.
Use different meats for easy variety
Leftover turkey, diced ham, or browned ground beef all fold into the same layering method. We also call out rotisserie chicken as a quick shortcut when you want minimal prep.
Mixed vegetables and fresh options
Peas, carrots, corn, and green beans work well. Fresh vegetables should be diced small so they cook through in the bake.
Gluten-free path and potato add-ins
Choose a gluten-free biscuit mix and check soup and broth labels to keep the whole dish compliant. If adding potatoes, parboil first — they absorb gravy and may reduce final sauce.
| Swap | How we use it | Result |
|---|---|---|
| Turkey/Ham | Sub 1:1 for meat | Richer, savory flavor |
| Ground beef | Brown and season first | Hearty casserole texture |
| Gluten-free mix | Replace biscuit mix; check labels | GF-friendly topping |
| Potatoes | Parboil before adding | Thicker gravy; heartier meal |
“Keep the same do-not-stir layering so the topping stays lofty and tender.”
Storage, reheating, and make-ahead
Plan ahead: smart storage and reheating preserve the golden top and creamy filling so every reheated serving tastes close to fresh. Cool the casserole slightly, then move it into the right containers for storage.
Store in an airtight container
Once the bake cools, we transfer portions to an airtight container and refrigerate. Keep leftovers for 3–4 days to maintain best quality.
We avoid freezing when possible because the biscuit topping can lose its texture after thawing.
Reheat for best texture and flavor
Reheat in a 350°F oven for about 10 minutes until heated through and the top revives. For speed, heat single portions in a microwave, knowing the top may soften.
Cover the dish loosely if the top is already deeply browned to prevent over-coloring. Finish with a light brush of melted butter to restore aroma and sheen.
Make-ahead strategy
Prep the filling and biscuit mix separately in a bowl, refrigerate, and assemble when ready to bake. Expect a few extra minutes of bake time if components start cold.
For hands-off plans, consider our Chicken and Dumplings options — crockpot and 4-ingredient versions — as alternate make-ahead ideas that use similar pantry swaps.
- We store cooled leftovers in an airtight container for 3–4 days.
- Avoid freezing the assembled bake to protect the biscuit layer.
- Reheat in the oven ~10 minutes for a crisper top; microwave for convenience.
- Prep filling and biscuit mix separately for easy assembly and slightly longer bake time when cold.
- Label containers with date and contents for smooth weeknight planning.
Chicken cobbler recipe
Start by preheating the oven to 350–375°F and pouring 4 Tbsp melted butter into a 9×13 baking dish so edges brown evenly.
Layer 3–4 cups rotisserie chicken or shredded chicken, then scatter a 12 oz bag of frozen mixed vegetables. In a separate bowl, whisk a 10.5 oz can of cream chicken soup with 2 cups chicken broth, garlic powder, onion powder, and black pepper. Pour over layers without stirring.
In another bowl, combine an 11.36 oz Cheddar Bay biscuit mix with 2 cups milk (fold in 1/2 cup shredded cheddar if desired). Spread the biscuit topping gently over the sauce—do not mix—so the batter floats and rises during baking.
Bake 50–65 minutes until the top is very golden brown and edges set. Mix 2 Tbsp melted butter with the seasoning packet and brush across the hot top. Rest 10–15 minutes before serving so the filling firms and portions hold together.
“We keep cup measures and clear steps so this one-dish casserole works every time.”
| Step | Action | Time |
|---|---|---|
| Prep | Preheat oven; melt butter in baking dish | 5 minutes |
| Assemble | Layer meat, vegetables, sauce; top with biscuit mix | 10 minutes |
| Bake | Bake until deep golden brown; brush with seasoned butter | 50–65 minutes |
Conclusion
Make this one-dish win a regular: we get a richly flavored chicken cobbler topped with a buttery biscuit and a Cheddar Bay finish that looks and tastes special. A quick post-bake brush with the bay biscuit mix seasoning seals color and flavor on the top and is the simple step that changes everything.
Want variety? We encourage you to use different meats or mixed vegetables to refresh the dish. Season the filling with black pepper, garlic, and onion powder so the flavor never falls flat. For an even faster switch, try our Chicken and Dumplings crockpot or 4-ingredient playbook—same cozy profile, less time.
Store leftovers in an airtight container for 3–4 days and reheat in a 350°F oven about 10 minutes to revive the crisp top. Add this recipe to your rotation—prep once, bake when ready, and enjoy repeatable flavor every time.


